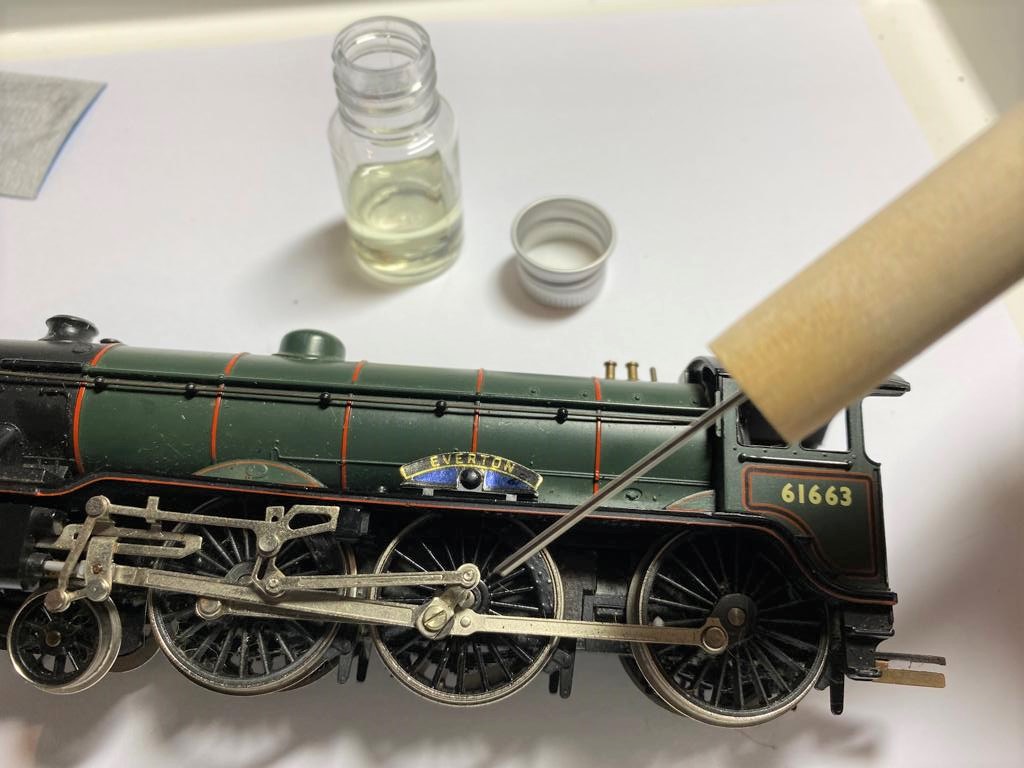
One drop of oil is plentiful, the model train gurus always say. That means one tiny drop of oil when you are lubricating your locos!
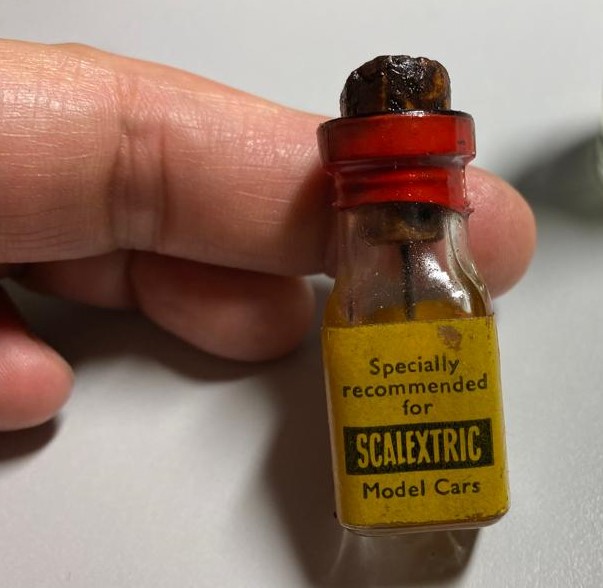
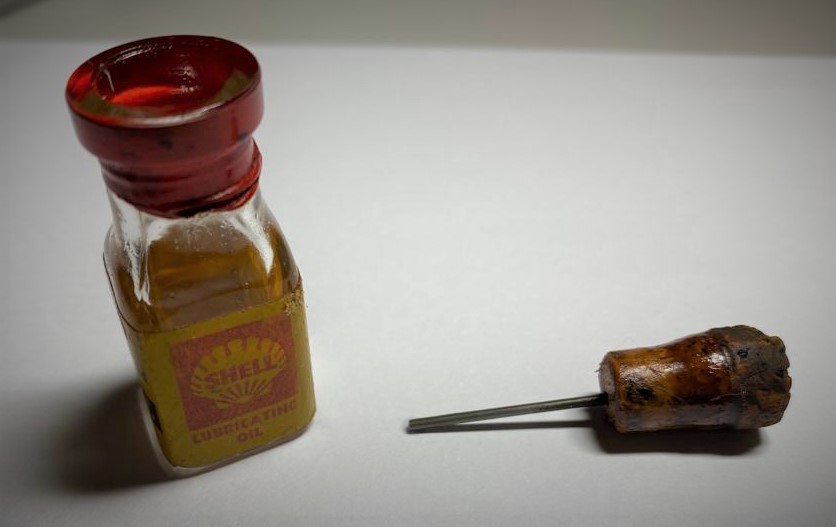
I had a simple lubricator that dates back from 1964. It was made by Shell lubricants for Scalextric model cars. The cork stopper was wearing out and it was messy holding it.
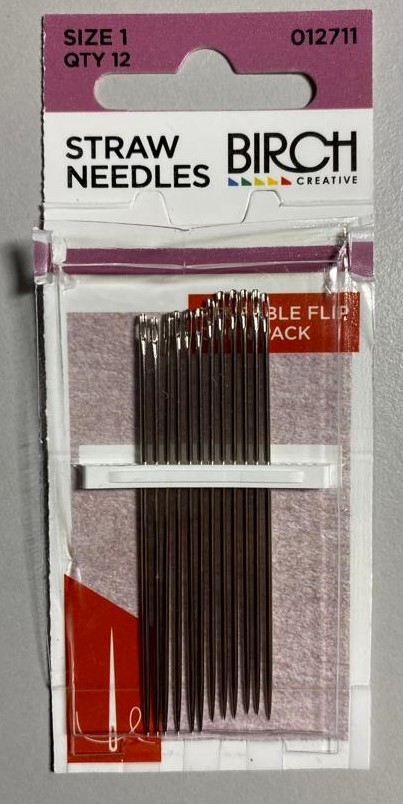
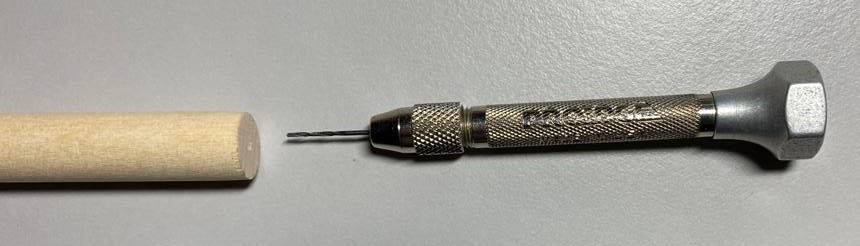
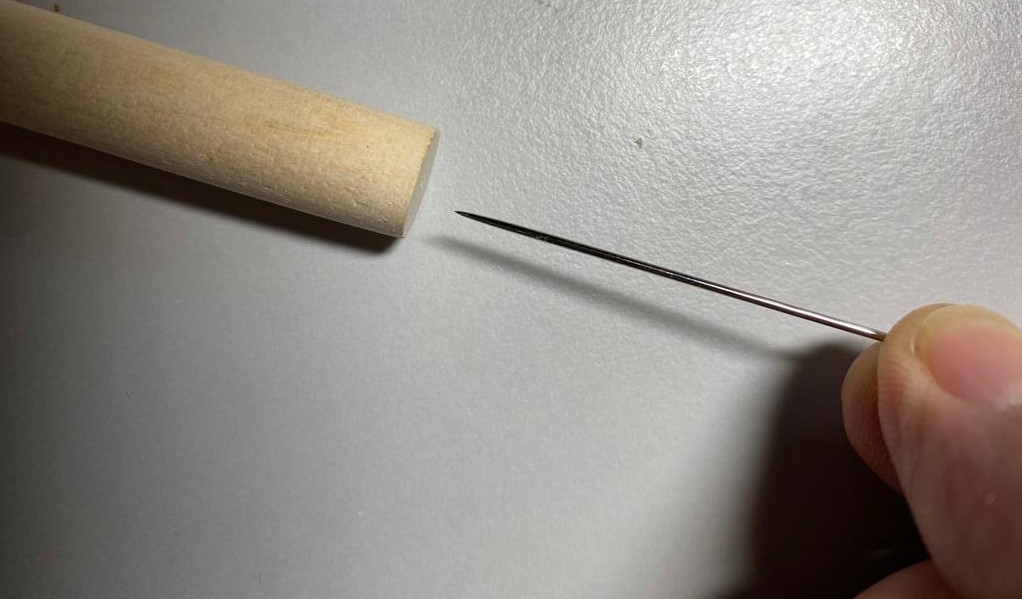
So I decided to build myself a new one. I bought a pack of sewing needles from Spotlight. They were 1mm dia. I also bought a dowel (wood) of diameter 12 mm from Art Friend. You can use a smaller diameter dowel but I find that 12 mm is comfortable for my hands. I measured 130 mm length off the dowel and cut it. (You can decide how long the lubricator handle needs to be.) Then used a tiny drill bit to make a hole for the needle to stick in. It is easier to stick the sharp end of the needle into the wood. I used a small hammer to bang the needle in about 10 mm deep. I then cut off part of the needle with wire cutters to have a length of about 30 mm sticking out from the dowel. Its up to you how long you want the needle to stick out. You control the drop size of the oil by the depth you stick the needle into the oil pot!
Do contact me if you need more info or help building one. All shops are based in Singapore.
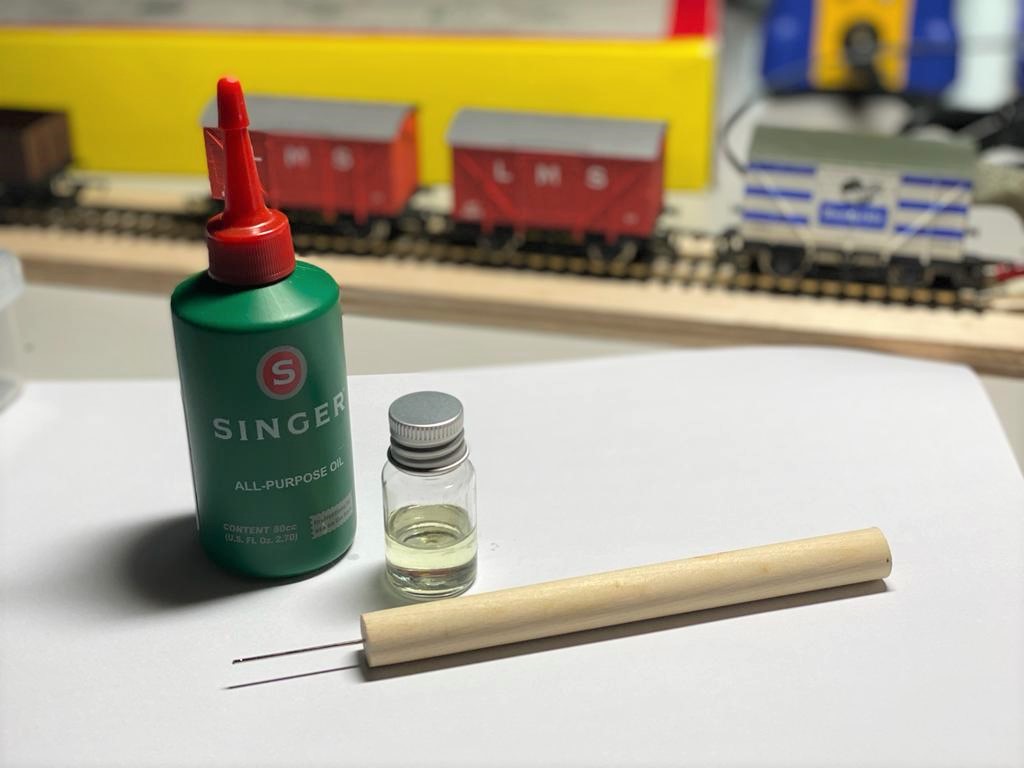
I used a little plastic bottle with a screw cap as my oil pot. Do check that your dowel will fit into the bottle. There is nothing fancy about the type of lub oil I am using. I now have a new lubricator that works well!
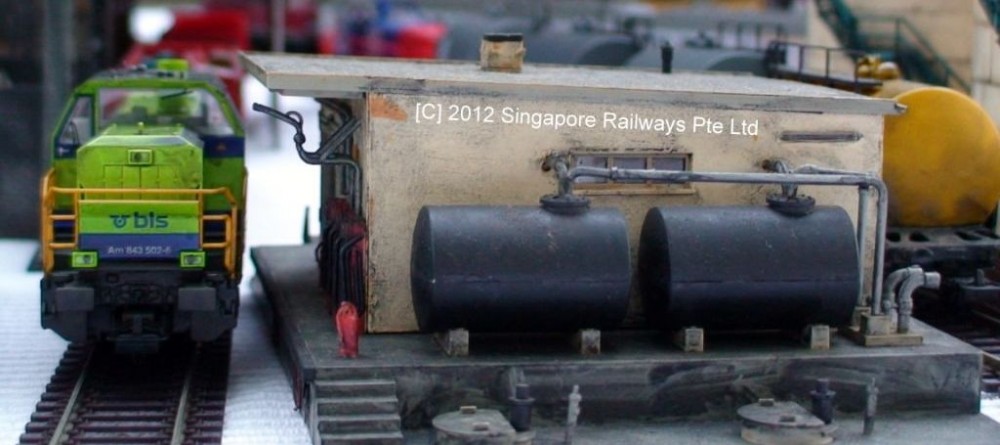
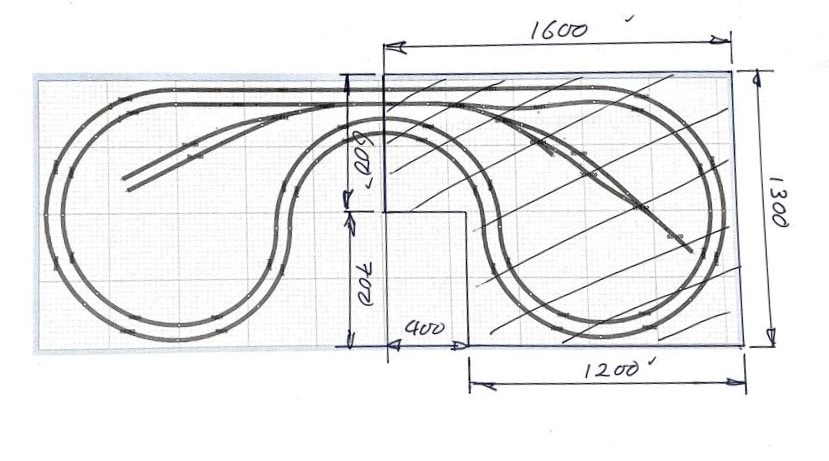
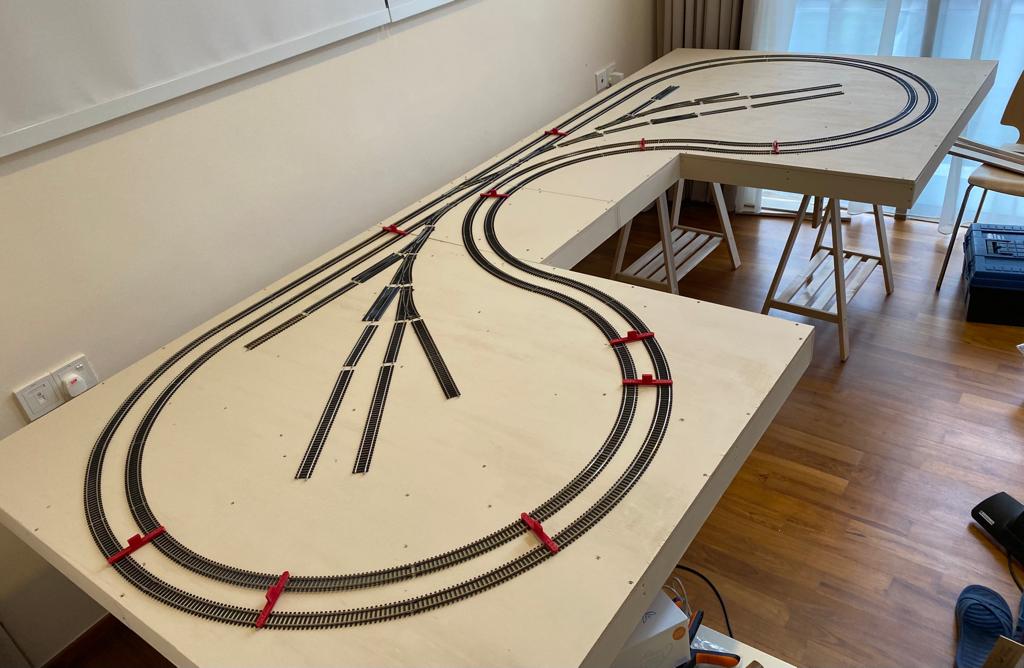
Model trains are meant to be enjoyed on tracks! After putting it off for 36 years, I summoned my courage to build a baseboard. I have since amassed a fair number of OO gauge locos and rolling stock, and more recently, HO stuff from Singapore Railways Pte Ltd (SRPL). I wanted a layout with long tracks, and for two trains to run continuously. Thomas (SRPL) gave me some ideas and I finally settled on a dog-boned layout. I downloaded the plans from the internet. The outermost radius measures 572 mm while the inner radius is 505 mm. The baseboard measures 3.2 m on the longest side and is 1.3 m wide. As I wanted the baseboard to be portable, I built it in two main sections and joined them by bolting the two parts together. Building multi-layered tracks is out of the question for now as the baseboard has to be portable. One advantage of this layout design is that I can add in longer straight modules in the center to extend the baseboard indefinitely (if I can find the space)! I had almost enough tracks in my collection to build the layout. All tracks used are Hornby’s standard code 100.
Layout on plan
Building the baseboard
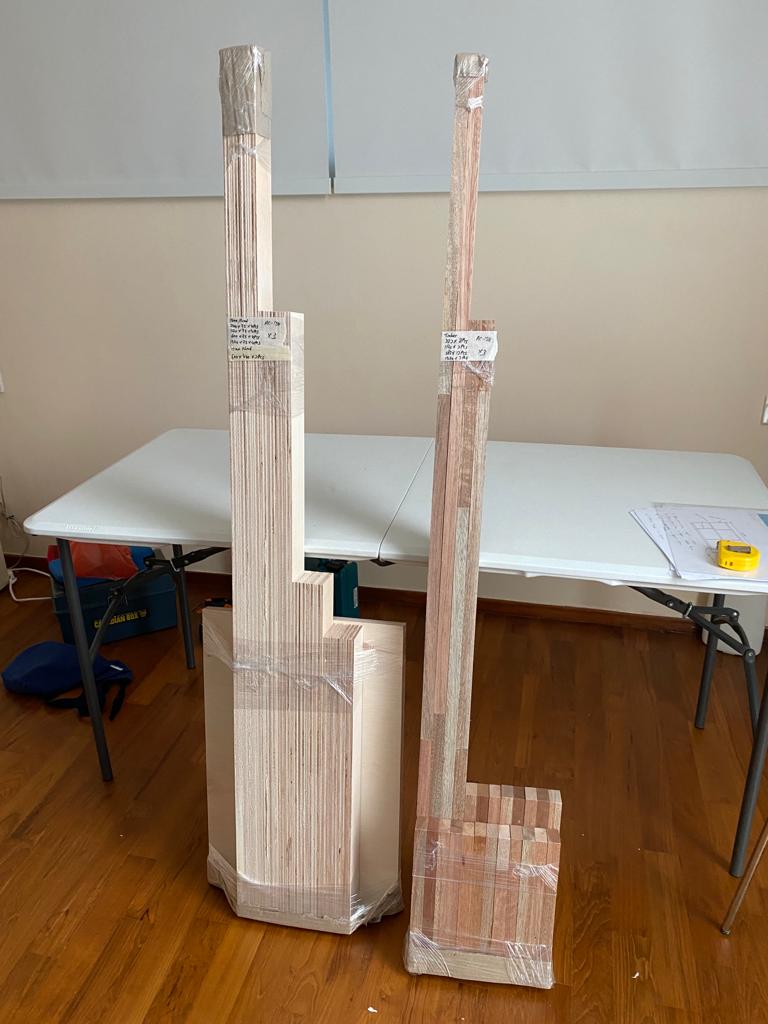
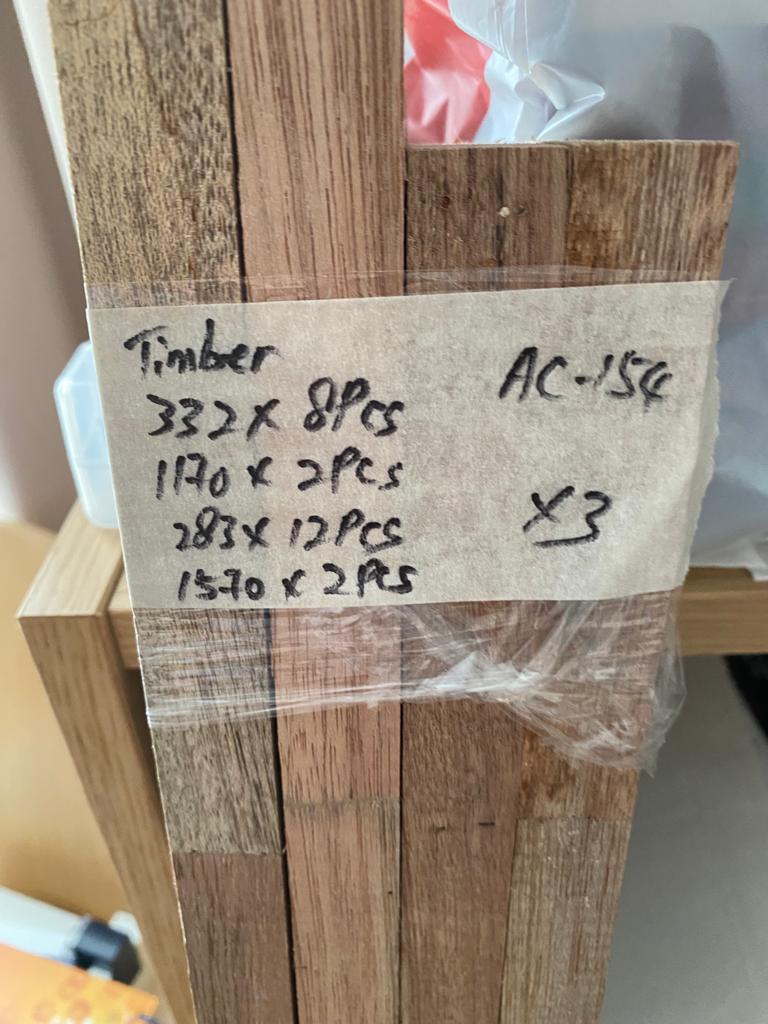
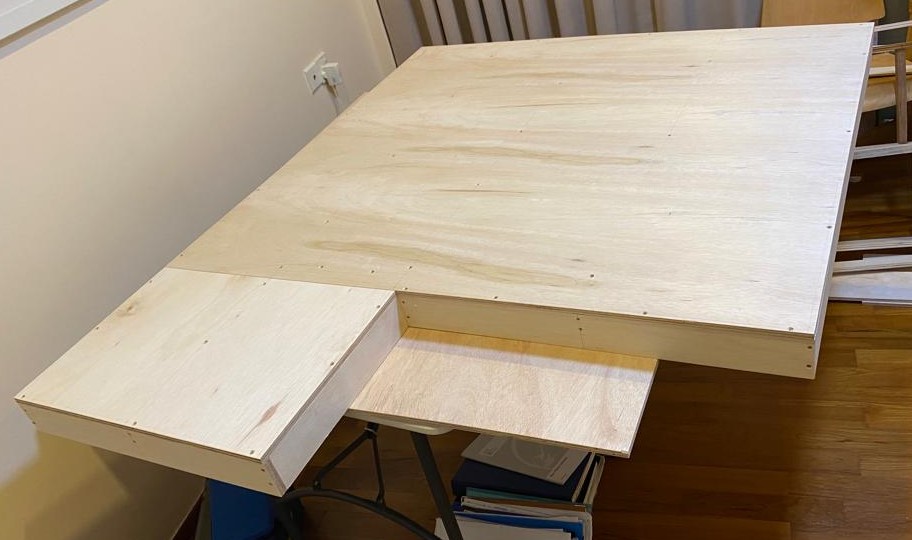
Everything that I have read on model rail layouts emphasized on building a strong and rigid baseboard to ensure trouble free running of trains for years. This is even more important if the baseboard is portable. I laid my tracks on the floor and test run with trains before taking the overall measurements for the full-sized baseboard. As I do not have any carpentry skills, I decided to order my wood ready cut from Plywood Online. Besides ensuring straight cut wood, it is a lot faster too (I collected the next day). It took me three times to work out the exact wood dimensions before I confidently sent it to the shop for the order. It pays to check over the dimensions a few times! Always draw the plan on paper with the dimensions clearly. It does give clarity on what is needed. The first quote I received from the wood shop was far too expensive because I used too much plywood. So, I used timber for all the spars and plywood for the outer frame as I wanted the latter to be 75mm wide. This reduced the price considerably by about 50%.
The cut wood came in neat bundles!The timber measures 22 x 44 mm
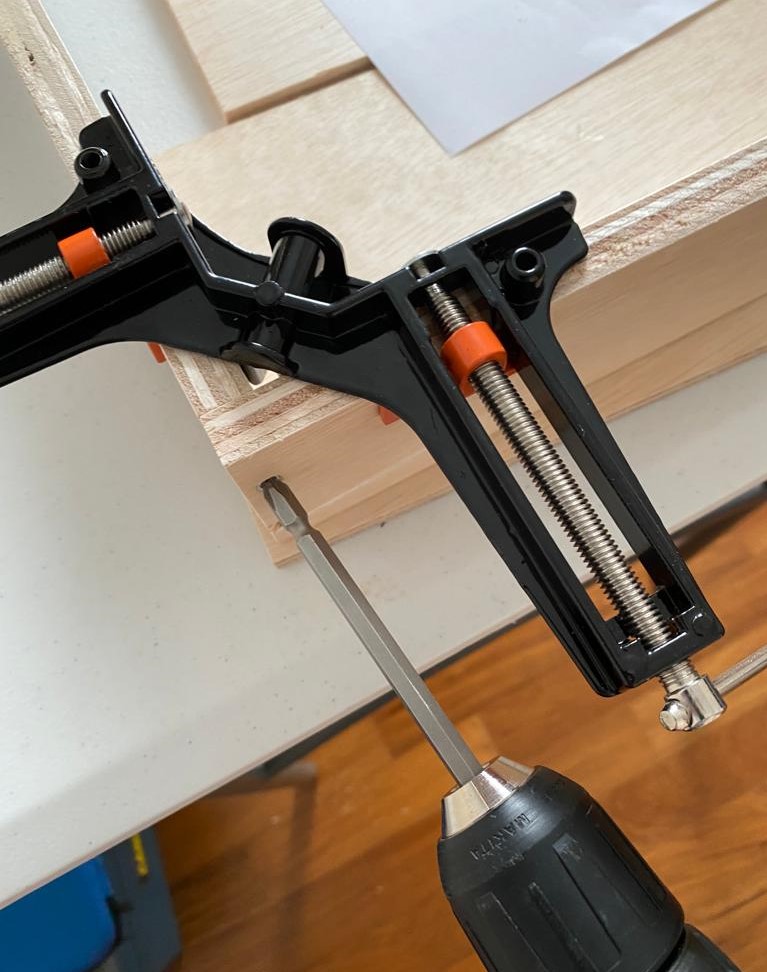
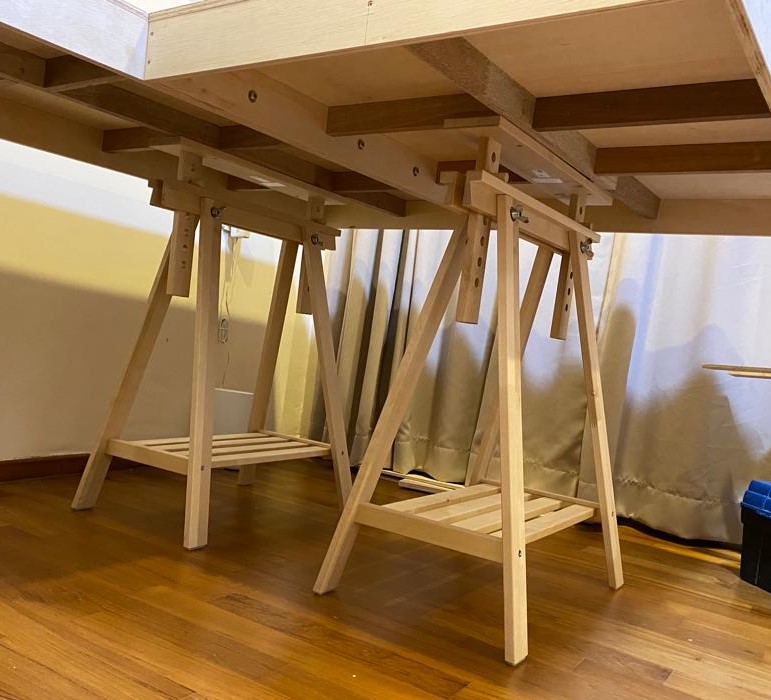
I used a right-angle clamp to ensure my corner joints are square. All holes were pre-drilled with a 2 mm drill bit followed with a countersink drill to ensure the screw head will stay below the surface of the board. I used number 6 x1.5” wood screws and used two screws per timber joint. I did not use wood glue for joints as I forgot all about it! But for fixing the 12mm thick plywood sheet onto the frame, I used both screws and wood glue. I have a table-top vertical band saw and this was invaluable in trimming off excess wood to fit the timber spars in quickly. Finally, I applied a coat of acrylic paint on the top of the wood.
Right clampUnderside of baseboard with timber spars
Support for baseboard
For the baseboard support, I took the easy way out. I bought four sets of trestles from IKEA. They turned out to be quite rigid and my base board is well supported. I now have a portable baseboard with supports that could be dismantled.
Completed right section of baseboardTrestles from IKEA
Baseboard alignment
After aligning the two sections of the baseboard and bolting them together with 4 bolts (M8 x 90 mm), it was ready to have the tracks laid out on it. I had track spaces 3D printed out for me and they were extremely useful to ensure the tracks were evenly spaced side-by-side. (The spacers are red colour on the track layout). This ensures longer locos or coaches will not hit another passing train at the curves. I tested with long trains of wagons and coaches, and they chugged along merrily – it was a dream come true for me!
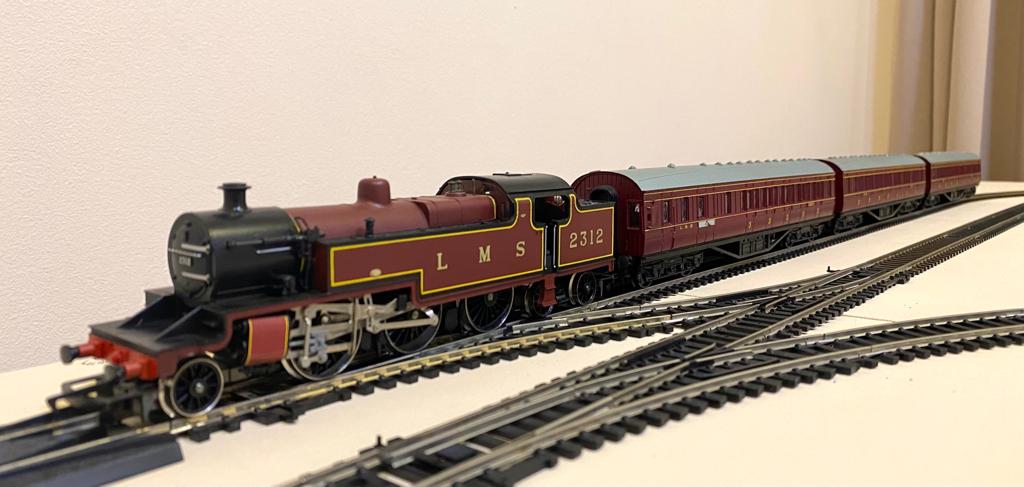
The completed baseboard. The red strips are track spacers to ensure even spacing between two tracks.Hornby LMS 2-6-4 Fowler 4P loco
Final thoughts!
Building a baseboard was not as intimidating as I thought and I am glad that I did it. I will test the board over a few weeks before pinning the tracks down. I am still undecided on the plan for the sidings. I want to solder the tracks onto the board (where both boards are joined) so it could be easily aligned after dismantling. I plan to ballast the tracks, build a tunnel, have a station platform, etc, later. This will take a while to complete. I am still figuring out a diorama that will suit both the British and European scene. In the end of the day, I am no purist.
“Model trains are meant to run on tracks”, and I enjoy seeing them do so!